
Looking Beneath the surface of Microsoft 365 – Microsoft Planner
The task management platform marketplace is a crowded one! With literally hundreds of platforms claiming to take the stress out of coordinating tasks, choosing the best solution for your business may seem like a daunting task.
While many of the options are accomplished and highly useful tools, we’d recommend 365 users explore the tools that exist within the MS 365 ecosystem before looking further afield. Such tools offer synchronicity across the 365 environment giving users a seamless experience, eliminating compatibility concerns, and avoiding the use of ‘siloed’ applications, which don’t communicate with one another.
Microsoft Planner is one of these tools. It offers intuitive yet powerful task management capabilities; allowing all employees to take command of their tasks and manage their time more effectively.
The main advantage of Planner – Microsoft 365 groups
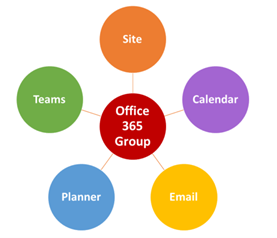
Planner works seamlessly with the Microsoft 365 ‘groups’ concept. A ‘group’ is basically a set of employees who need access to shared resources to collaborate on a project. Creating a plan within planner is one way to create a group and doing so will automatically give members collective permission to access a broader set of resources. They’ll be able to access a shared set of documents in the Plan’s corresponding SharePoint site and participate in group discussions relating to the project within Teams for example.
Planner’s component parts
Tasks
Setting up a task within Planner is an extremely straightforward process that can take as little as a few seconds by including basic information such as task name, assignee, and due date. Alternatively, you can ‘flesh out’ a task with more exhaustive information, and include details such as:
- Priority
- Completion status
- Start date
- A description
- Relevant file attachments
- Labels (to colour-code tasks according to user-defined categories)
- A Checklist – A multi-step process can be laid out to ensure employees carry out all the necessary actions.
Each task window also features comments sections, where you can post queries and comments pertaining to the task in question.
Buckets
‘Buckets’ are a simple way to organise tasks based on a framework that’s entirely within your control. You might want to arrange tasks into phases, create a bucket for the most urgent tasks, or group tasks according to assignees; the choice is yours.

Views
A fundamental component of any good task management platform is the ability to review data relevant to the tasks you’ve set. Planner incorporates 3 view modes to help you do just that.
Board View
This view displays a plan in a ‘Kanban Board’ style arrangement, showing each task on an individual card. Tasks are arranged in their assigned ‘buckets’ with due dates and checklists clearly visible.
Chart View
The chart view displays task progress information on an easy-to-interpret dashboard.

Schedule View
This view shows tasks on a calendar format, so you can plan work well in advance and allocate staff resources efficiently.
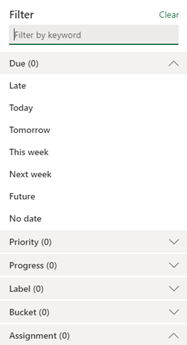
You can also apply filters to each of these views, allowing you to focus in on tasks with common attributes. You can filter by due date, priority, progress, label, bucket or assignee.
Planner Hub
The ‘Planner Hub’ displays individual plans of work in the same way that the ‘board’ view in each plan displays individual tasks. This gives you a broad overview of all the projects you’ve got going on.
The ‘My Tasks’ view
This helpful view displays all the tasks assigned to you. This is useful when you have been assigned many tasks located within separate Plans. ‘My View’ collects all your jobs in a single location so nothing slips through the net.
It works together with To Do
Adopting Planner doesn’t mean you should abandon To-Do; why not use both? To Do automatically displays Planner tasks you’ve been assigned so you can keep track of both personal errands and group tasks within the To Do interface.
It’s deeply integrated with both Outlook, SharePoint…and of course Teams
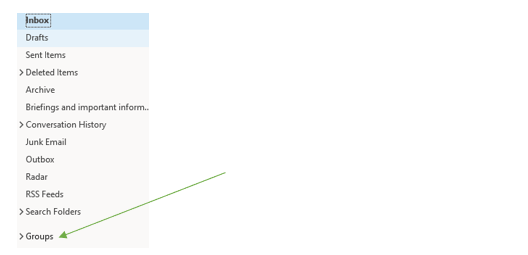
Planner and Outlook are deeply entwined. Outlook automatically gathers emails according to ‘group.’ This makes it easy to view all the correspondence relating to a particular plan by selecting the appropriate group from the menu at the side of the Outlook window.
You can also view plans within your Outlook calendar using an ‘iCalendar feed.’ Setting up an iCalendar link which can be shared to all group members will give all Plan collaborators the ability to view the plan from within their Outlook accounts. Additionally, all emails relating to a particular Plan are gathered in the ‘conversation’ tab at the top of the Planner window.
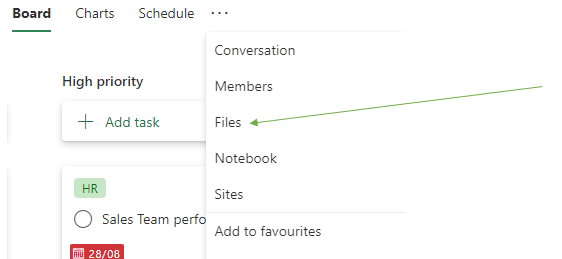
Planner is similarly closely integrated with SharePoint and Teams. The creation of a new ‘plan’ automatically launches a corresponding SharePoint site which can be accessed from a drop-down menu at the top of the Planner interface under ‘files.’
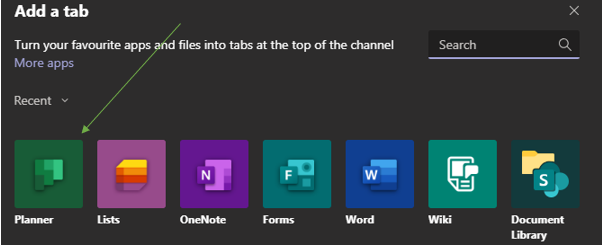
Launchable as an app within Teams, you can pin planner to individual chat channels so that your tasks are never far from the centre of group discussions.

How can we help?
Here at VaraTech we offer a broad range of IT support and consultancy services that aim to help small businesses extract maximum value from their IT. From proactive network monitoring/maintenance and hardware leasing to Cloud services, VoIP telephony and much more, we help our clients identify and roll-out the best-fit solutions for their businesses.
We’re cloud computing experts! We can help your business leverage the potential of some of the most empowering Cloud services, such as Microsoft 365. Why not get in touch today, to discover how the flexibility, scalability cost-efficiency, convenience and security of Cloud services can help your business realise its potential.